

Coordinating snow removal across multiple entrances is defined as the planned, sequential clearing of all access points on a property to maintain safety and legal compliance during winter storms. Properties with more than one entrance face compounded risk: a missed side door or service gate can create liability just as quickly as a blocked main entry. ADA guidelines require accessible routes and building entrances to be fully cleared within 24 hours after a storm. The United States averages about 104 snow-producing storms annually, each lasting 2–5 days, which means sustained, organized snow removal logistics are not optional. They are the baseline for any responsible property owner or manager.
How to coordinate snow removal multiple entrances: tools and resources
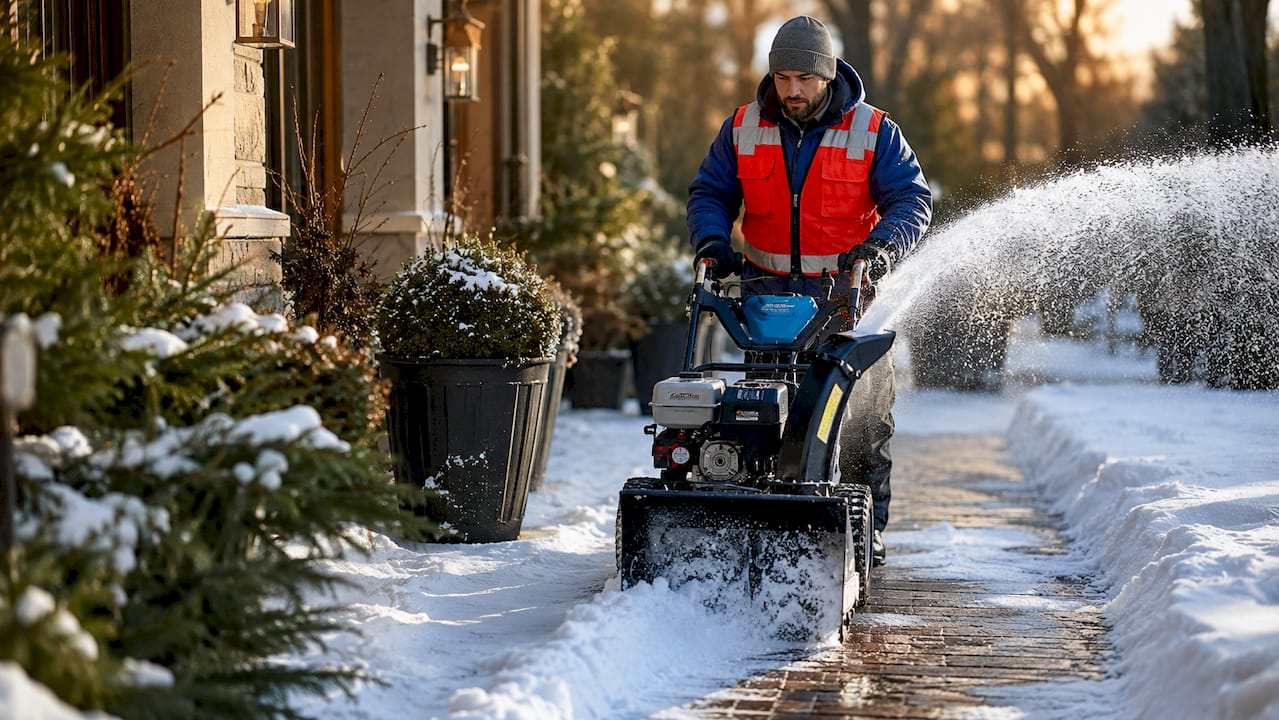
The right equipment determines how fast and safely you clear each access point. A single snow blower works for a residential front walk, but a property with a main entry, a side gate, and a rear service door needs a layered approach. Matching tool to surface type prevents damage and speeds up the job.
| Entrance type | Recommended tool | Best for |
|---|---|---|
| Main pedestrian entry | Walk-behind snow blower | Moderate accumulation, concrete |
| Narrow side walkways | Hand shovel or cordless snow shovel | Tight spaces, low volume |
| Rear service or loading area | Skid steer or compact plow | Heavy accumulation, large area |
| ADA ramp and curb cuts | Hand shovel with deicing salt | Detail clearing, ice remediation |
| Parking lot access lanes | Full-size plow truck | High-volume, fast clearing |
Digital tools matter just as much as physical equipment. Manual coordination via phone or radio causes delays; dispatch software with live truck tracking enables real-time rebalancing during a storm. For property managers overseeing multiple buildings, route planning software removes guesswork from crew assignments and cuts response time significantly.
Site mapping is the foundation of efficient snow removal entrances management. Before the first storm, walk the property and mark every access point, its surface type, and its traffic priority. This map becomes your crew’s instruction sheet on storm day.
Pro Tip: Choose equipment based on surface sensitivity, not just area size. Rubber-edged blades protect pavers and decorative concrete that steel blades would chip or scratch.
How do you create a priority map for managing multiple entrances?
A priority map categorizes every entrance into one of three tiers so crews always know where to start. A site-specific priority map with primary, secondary, and tertiary zones helps vendors focus on the highest-risk areas first. Without this structure, crews default to clearing what is easiest or closest, not what is most critical.
Tier 1: Primary zones include main building entrances, ADA-compliant routes, fire lanes, and emergency exits. These must be cleared first, every time, regardless of storm intensity. The 1-inch accumulation trigger applies here.
Tier 2: Secondary zones cover sidewalks connecting parking areas to buildings, secondary pedestrian walkways, and bike storage access. These get cleared after primary zones are complete and before conditions worsen.
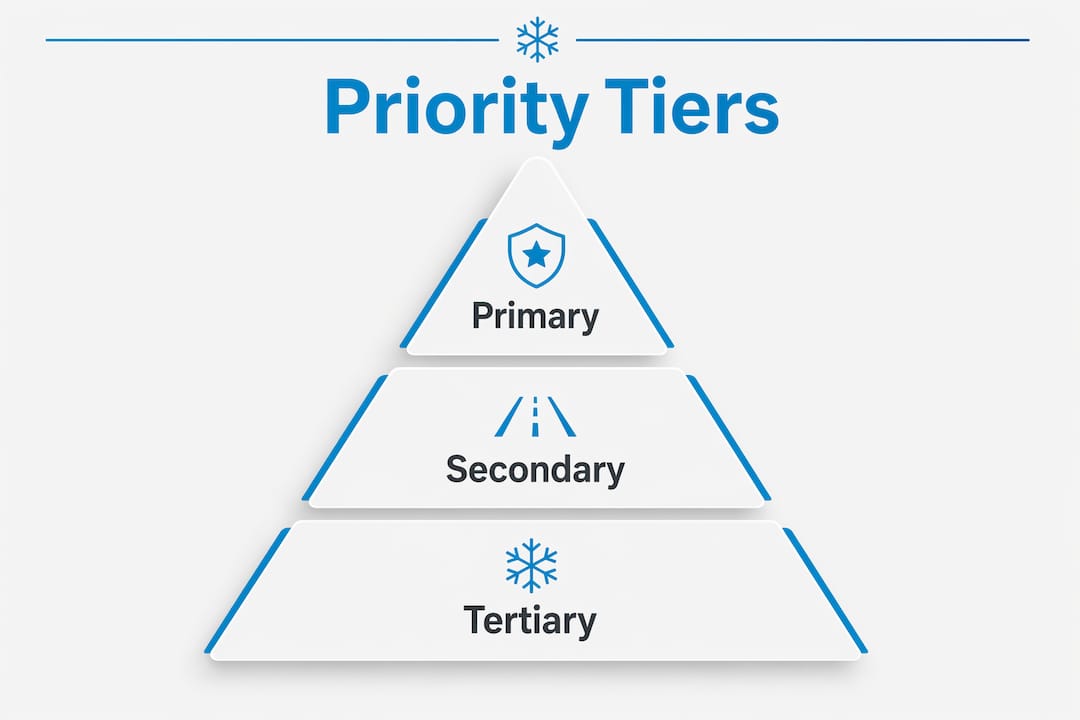
Tier 3: Tertiary zones include overflow parking areas, rear utility access, and low-traffic side paths. These are addressed last and tolerate a 2-inch trigger before service begins.
| Priority tier | Examples | Clearing trigger | Target response time |
|---|---|---|---|
| Primary | Main entry, ADA routes, fire lanes | 1 inch accumulation | Within 1–2 hours of trigger |
| Secondary | Connecting sidewalks, secondary doors | 1–2 inches | Within 2–4 hours |
| Tertiary | Overflow lots, rear utility paths | 2 inches | Within 4–6 hours |
Conduct a full site walkthrough in october or november, before snow arrives. Note drainage patterns, areas that refreeze quickly, and any entrances that receive shade all day. Update the map if you add a new entrance, change a tenant, or alter traffic patterns mid-season.
Pro Tip: Photograph every entrance during your walkthrough and attach the photos to your priority map. Crews who are new to the property can orient themselves instantly without a site visit.
What is the step-by-step process for scheduling snow removal during a storm?
Effective snow clearing at multiple points depends on timing decisions made before the storm hits. Industry standard service triggers are set at 1 inch of accumulation for high-priority surfaces and 2 inches for parking lots and driving lanes. Basing triggers on on-site measurements rather than weather forecasts prevents both premature callouts and missed service windows.
Finalizing winter maintenance plans by july allows precise service definitions, access arrangements, and reduces operational risk during the season. Booking crews and contracts in summer means you are not scrambling when the first storm warning arrives. Early planning for seasonal snow preparation pays dividends every time a storm hits.
Step-by-step coordination process:
- Confirm your priority map and crew assignments before october 1.
- Set automated weather alerts tied to your accumulation triggers.
- Dispatch primary zone crews the moment the 1-inch threshold is reached.
- Stage secondary zone crews to begin as primary zones are completed.
- Use dispatch software or a group messaging app to relay real-time route updates.
- Deploy tertiary zone crews once secondary areas are clear and storm intensity allows.
- Conduct a post-storm walkthrough to verify all entrances are clear and documented.
Documentation is not optional. GPS timestamps, crew check-in photos, and service logs protect you if a slip-and-fall claim arises. Many property managers use mobile apps that auto-generate service reports with location data attached.
- Assign one point of contact per property to receive crew updates.
- Keep a backup crew or on-call contractor for equipment failures.
- Pre-apply anti-icing product to ADA ramps and shaded walkways before a storm.
- Recheck all entrances two hours after initial clearing for refreezing.
- Log every service event with time, crew, and conditions noted.
What are the most common mistakes in multi-entrance snow clearing?
Uneven snow piles are the most frequent problem in snow removal logistics for multi-entrance properties. Crews that push snow toward building faces create blockages at secondary and tertiary entrances as the storm continues. The correct technique is back-pushing snow away from building entrances before moving it to collection points. This single habit prevents a cascade of access problems during long storms.
Missed routes happen when coordination relies entirely on verbal instructions. A crew member who clears the front entry and assumes another team handled the side gate creates a gap that no one notices until a resident or customer reports it. Integrated dispatch software eliminates this by assigning and confirming each zone digitally.
Equipment breakdowns mid-storm are inevitable over a full winter season. Every property manager needs a backup plan: a secondary contractor on speed dial, a spare snow blower for pedestrian paths, or a manual shoveling crew for critical ADA routes. Relying on a single machine for all entrances is the fastest way to fail a compliance check.
Slip-and-fall liability is higher on pedestrian walkways than in parking lots. Contracts should separate sidewalk and entrance clearing from lot plowing so each receives the attention and priority it legally requires. A single icy patch at a building entrance carries more legal exposure than an unplowed corner of a back lot. Separating these scopes in your service agreement protects you and your contractor.
How do you keep entrances safe and accessible after snow removal?
Clearing snow is the beginning of the job, not the end. ADA guidelines require accessible routes to stay clear for 24 hours after a storm, which means refreezing is your next problem to solve. Ice remediation through salting or calcium chloride application directly after clearing extends the safe window significantly.
Proper snow placement prevents secondary hazards. Snow piled against a building face melts and refreezes at the base of the entrance. Snow piled across a sidewalk narrows the accessible path below ADA width requirements. Designate collection zones away from entrances and drainage paths before the season starts.
Lighting and signage matter more in winter than any other season. Reduced daylight hours mean residents and visitors navigate icy paths in the dark. Confirm that entrance lighting is functional and that any temporary hazard signs are visible and upright after each clearing event.
- Apply deicing salt or calcium chloride immediately after clearing primary entrances.
- Check that snow piles do not block sightlines at driveways or parking lot exits.
- Inspect ADA ramps and curb cuts for ice buildup every two hours during active storms.
- Replace any damaged or buried entrance signage before the next storm.
- Log all post-clearing inspections with time and crew initials.
Pro Tip: Mark your known refreezing spots with a small flag or cone at the start of the season. Crews can check these first on return visits without needing to re-inspect the entire property.
For properties with shared driveways, coordinate post-clearing inspections with neighbors or co-owners so no one assumes the other party handled the recheck.
Key takeaways
Coordinating snow removal across multiple entrances requires a written priority map, trigger-based scheduling, and post-clearing ice management to stay safe and legally compliant.
| Point | Details |
|---|---|
| Use a three-tier priority map | Assign every entrance to primary, secondary, or tertiary zones before the first storm. |
| Set accumulation-based triggers | Clear primary entrances at 1 inch; address parking and secondary areas at 2 inches. |
| Separate walkway and lot contracts | Pedestrian walkways carry higher liability and need their own scope and priority. |
| Document every service event | GPS timestamps and photos protect you against slip-and-fall claims. |
| Plan and book by july | Early contracts and crew assignments reduce risk and prevent scrambling mid-season. |
What I’ve learned after years of watching multi-entrance coordination go wrong
The mistake I see most often is treating all entrances as equal until something goes wrong. A property manager calls after a slip-and-fall at a side entrance that “the crew was supposed to handle.” The priority map existed in someone’s head, not on paper, and the crew made a judgment call that cost the property owner a legal headache.
The second most common mistake is waiting until october to book service. By then, the best contractors are committed. You end up with whoever is available, not whoever is qualified. Locking in a snow removal service for buildings before summer ends is not overcautious. It is the single decision that determines whether your winter runs smoothly or reactively.
Technology adoption is slower than it should be among residential property managers. A shared group chat is not a dispatch system. It does not confirm completion, log timestamps, or flag missed zones. Even basic field service apps with photo check-ins eliminate the “I thought they did it” problem entirely.
My honest recommendation: treat your priority map as a living document. Review it after every significant storm, update it when tenants change, and walk the property yourself at least once mid-season. The managers who do this rarely call me with emergencies. The ones who set it and forget it are the ones who end up with blocked ADA routes in february and a compliance notice in the mail.
— Jesse
Denversnowremovals: professional snow clearing for every entrance on your property
Managing snow removal across multiple access points takes planning, equipment, and reliable execution. Denversnowremovals has delivered professional snow removal across the Denver Metro area for over 44 years, with crews available 24/7 and equipment scaled to every property type.
Whether you manage a single-family home with a front walk and side gate or a multi-unit building with several access points, Denversnowremovals builds a service plan around your specific entrances and priority zones. Free estimates make it easy to get started before the season begins. Explore snow removal methods and seasonal preparation steps to understand exactly what your property needs before the first storm arrives.
FAQ
What does it mean to coordinate snow removal at multiple entrances?
Coordinating snow removal at multiple entrances means planning the order, timing, and equipment for clearing every access point on a property based on safety priority and legal compliance requirements.
What is the standard trigger for clearing building entrances?
The industry standard trigger is 1 inch of snow accumulation for high-priority surfaces like building entrances and ADA routes, and 2 inches for parking lots and driving lanes.
How soon must ADA-accessible entrances be cleared after a storm?
ADA guidelines require accessible routes and building entrances to be fully cleared within 24 hours after a storm ends to maintain compliance.
Why should sidewalk clearing be separate from parking lot plowing?
Slip-and-fall liability is higher on pedestrian walkways than in parking lots, so separating these scopes in a service contract ensures each receives the correct priority and attention.
When should property managers book snow removal contracts?
Finalizing snow removal contracts by july gives property managers the best access to qualified crews, precise service definitions, and reduced operational risk before winter begins.
Recommended
- How Shared Driveways Get Cleared Safely in Winter – Snow Removal Denver 303-591-2089
- How to Set Snow Clearing Expectations for Residents – Snow Removal Denver 303-591-2089
- Common Area Snow Removal: What Property Managers Must Know – Snow Removal Denver 303-591-2089
- Seasonal Snow Preparation Step for Homeowner Denver Colorado